Table of Contents
Connecting Remotely to Concordia Services2
Using Google Hangouts3
Setting up a Hangouts meeting3
Adding Hangouts Meeting to Calendar/Scheduling a Hangouts Meeting5
Accessing your Scheduled Hangout Meeting7
Using Google Hangouts Chat8
Creating Chat Rooms10
Using Remote Desktop Connection13
How to Connect with Remote Desktop13
Note: The contents of this document are subject to change without notice. Please contact helpdesk@concordia.ab.ca for more information
Connecting Remotely to Concordia Services
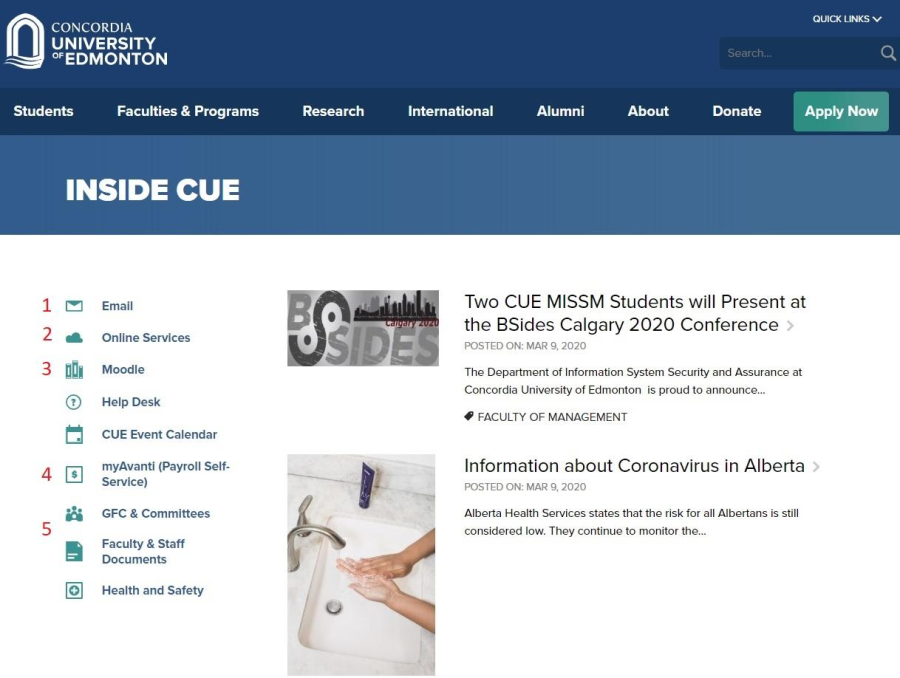
In the event that you have to work from home, you can access most of Concordia's services through our web portal, home.concordia.ab.ca
Services that can be accessed from this portal include (1) email, (2) Online Services, (3) Moodle, (4) payroll information, and (5) Alfresco, among other things. A snapshot of the page is provided below.
These Concordia services can also be accessed using the following alternative URLs:
Staff and student email |
https://mail.google.com |
Online Services |
https://onlineservices.concordia.ab.ca/ |
Moodle |
https://courses.concordia.ab.ca |
Avanti (Payroll Information) |
https://myavanti.ca/concordia |
Alfresco |
https://documents.concordia.ab.ca |
Using Google Hangouts
Google Hangouts is a communication tool that is part of the Google suite of products that Concordia University of Edmonton uses. The two main services, Google Hangouts Meet and Google Hangouts Chat, are aimed at enterprise communication, combining audio- and video-conferencing capabilities.
Setting up a Hangouts meeting
Google Hangouts uses your computer's audio and video settings to conduct an entirely audio, or a full video meeting session.
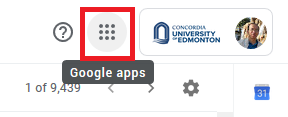
- With your email Inbox open, click on the apps icon (from the upper right-hand side of your Inbox window).
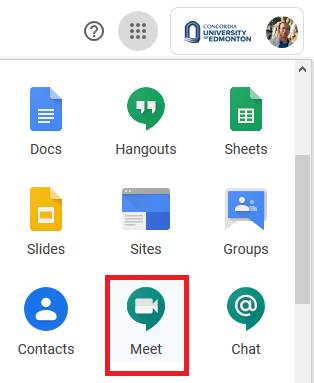
- Scroll through the list, and click on the Meet icon.
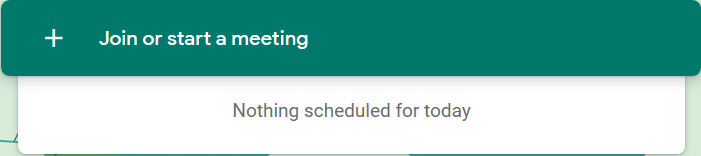
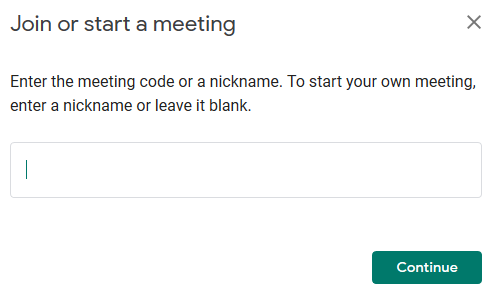
- Click on Join or start a meeting.
- Type a descriptive name for the meeting you are setting up, and click on Continue.
- a. If a message pop-up appears asking to allow access to the microphone, click on Allow.
b. To toggle your microphone from ON/MUTE, click on the microphone icon.
c. If a camera is available on your machine, you can toggle your camera ON/OFF using the camera icon.
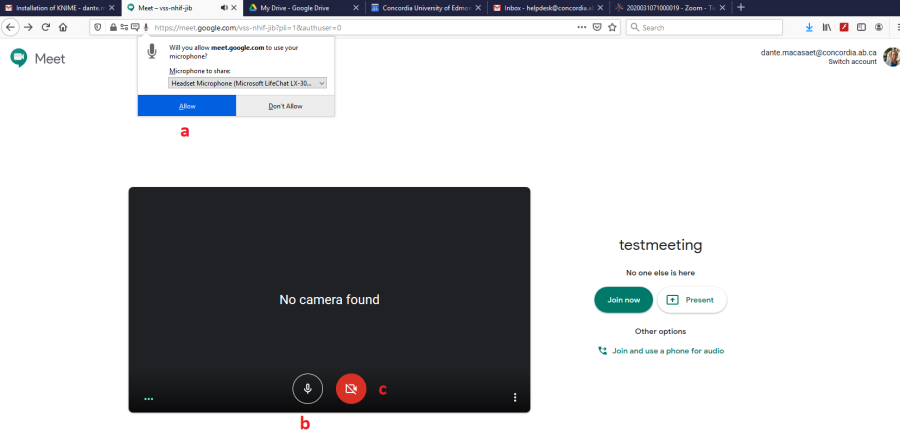
6. Click on Join now.
7. To add people to the Meeting session, click on Add people.
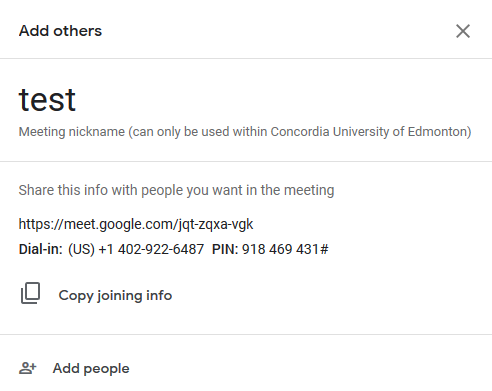
8. Type-in the name(s), or select from the suggested list of CUE staff you want to include in your meeting, and click on Send invitation.
Note: Instead of adding people in the meeting, the meet URL can also be shared (via email) with other individuals whom you want to participate in the meeting.
Adding Hangouts Meeting to Calendar/Scheduling a Hangouts Meeting
- From your calendar, click on a time slot from which you would want to schedule a meeting.
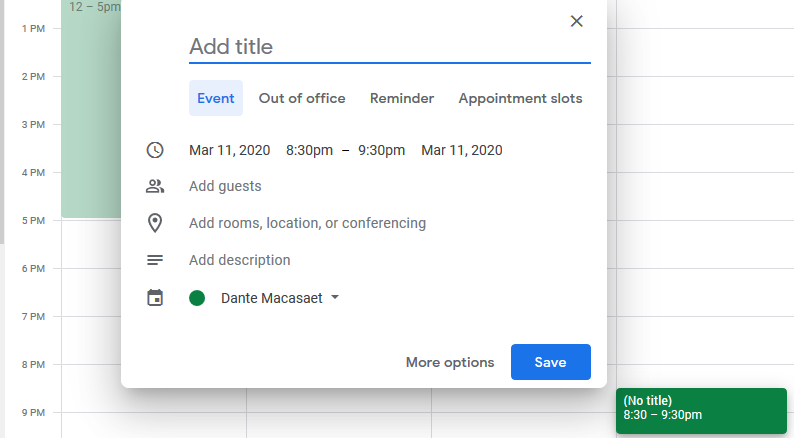
- Click on More options.
- Type-in the details of the meeting you are scheduling, including all the invitees to your meeting.
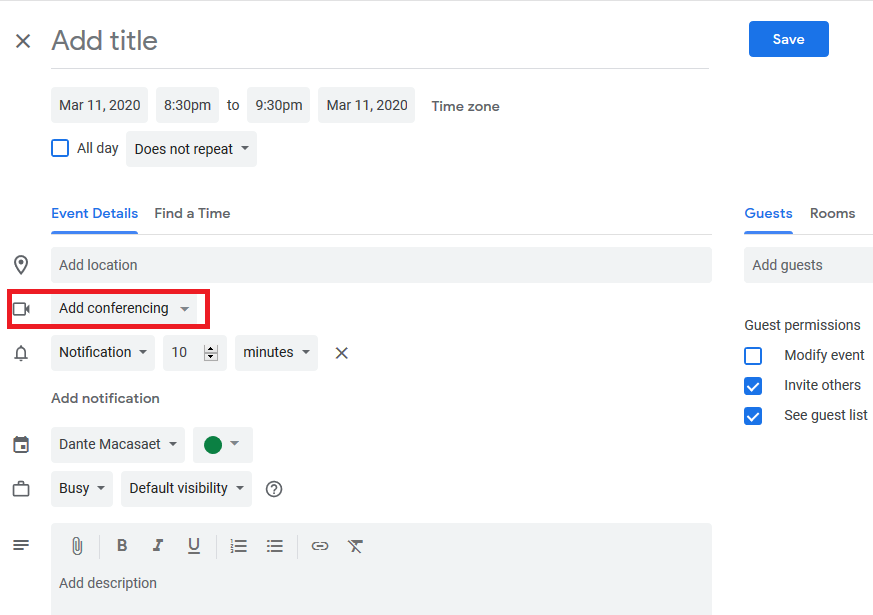
- To integrate Hangouts Meeting into your invite, click on Add conferencing, and choose Hangouts Meet.
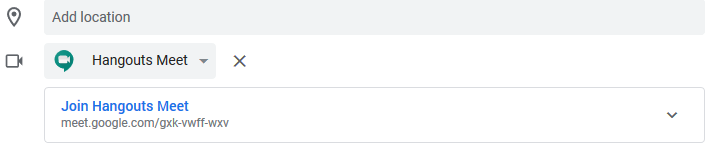
- A Hangouts meet URL will become available. Click on the drop down arrow to get additional information.
- Click on Save.
- A pop-up similar to the one shown below will appear.
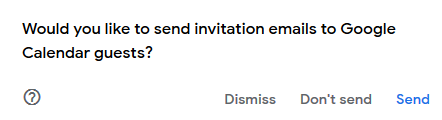
- Click on Send to send the invitation to your meeting to all your meeting participants.
- The meeting schedule will be added into your calendar.
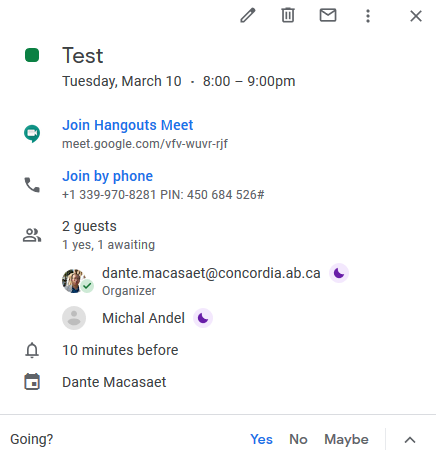
Accessing your Scheduled Hangout Meeting
- Go to your calendar, and click on the scheduled meeting.
- Click on Join Hangouts Meet.
- Allow for the use of at least a microphone during your meeting. Click on Allow to use the microphone on your machine so that you can project audio to your audience.
- For your audience to see you during the presentation, click on Allow for the video device on your machine to be shared, as well. This will also facilitate the screen-sharing option.
- If you want to record your session, click on the More Options icon (3 vertical dots), and choose Record meeting. To stop recording the meeting, click on the More options icon again, and choose Stop recording. All recorded meetings will be saved to your Google drive.
- To do your presentation, and make it visible to your audience, click on Present now. You have the option to share your entire screen or only a window on your screen for your presentation.
- To finish your presentation, click on Stop presenting.
Using Google Hangouts Chat
Google Hangouts Chat, the newer version of Google Hangouts, is another option for collaborative conversations/discussions.
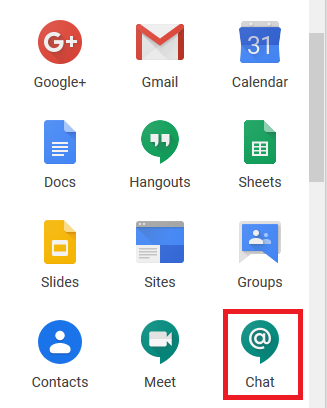
- With your email Inbox open, click on the apps icon (from the upper right-hand side of your Inbox window).
- Scroll through the list, and click on Chat.
- On first use, you may get a prompt message indicating, "To be notified when new messages arrive, turn on desktop notifications". If this a feature you would like enabled, click on Turn on desktop notifications, and click on Allow notifications.
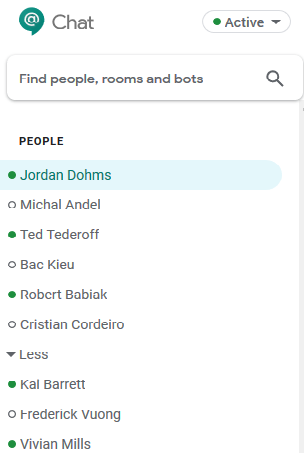
- A list of contacts you have had chats with in the past will be listed on the left-hand side of your screen, with current messages displayed on the middle part of your screen.
- To access the chat history for any individual, click on the person's name from the left-hand side list.
- To send messages to the currently selected contact, type-in your message in the chat box located at the bottom of your chat history.
![]()
- Type your message here
- Toggle history – switches from keeping all messages to deleting messages after 24 hours
- Upload a file
- Adding a Google Drive file
- Using video meeting – uses Hangouts Meet
- Adding emojis
- Send
Creating Chat Rooms
Google Chat rooms allows you to create a collaborative environment for invited members only. Colleagues and team members can read and type messages at any time or email messages direct to the room for others to read later. Multiple rooms can also be created with different members for the discussion of various endeavors.
- Click on this area, or press CTRL + K
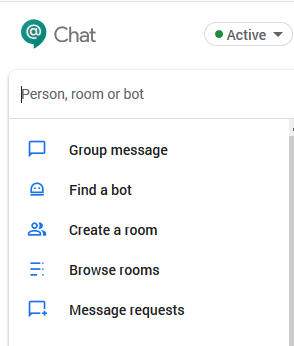
- Click on Create a room.
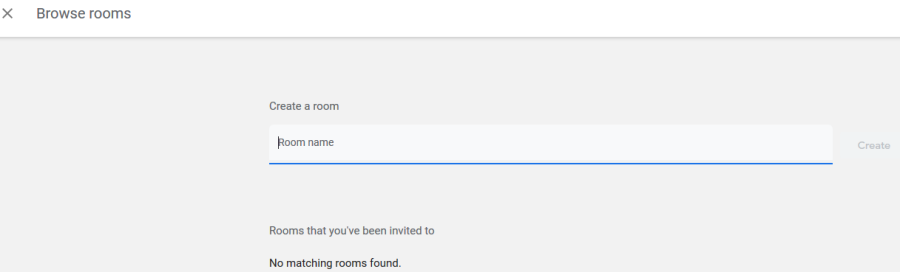
- Type-in a room name, and click on Create.
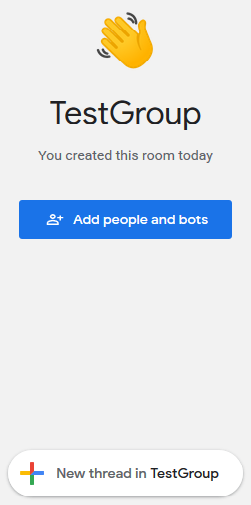
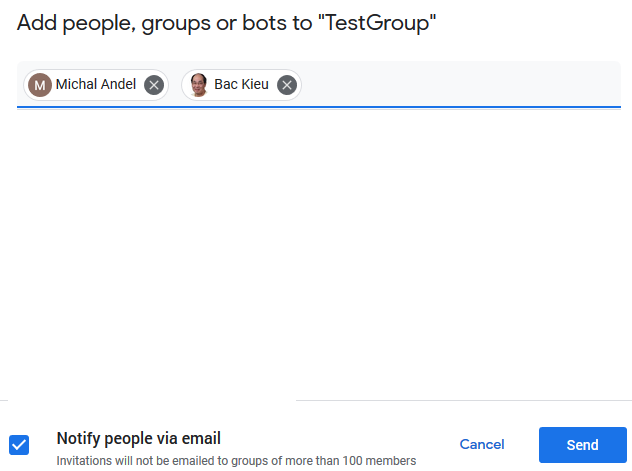
- Click on Add people and bots, and type-in the (partial) names of the contacts you would want include in the group chat.
To notify your contact of their inclusion into the chat room, keep the check mark next to Notify people via email, and then click on Send.
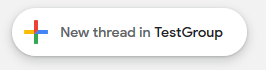
- To separate topics of discussion within the room, use different conversation threads. Click on New thread in groupname.
Using Remote Desktop Connection
If your work requires access to some specialized software, you will need to have remote desktop (RDP) access enabled. This can be initiated by supervisors making a request to IT Services at helpdesk@concordia.ab.ca
Once access is granted, you will be provided with an RDP setup file to connect to our campus servers.
To access an RDP session, run the Remote Desktop Connection app from your machine, and log-in with your CUE log-in credentials. A step-by-step guide is provided in the next section.
How to Connect with Remote Desktop
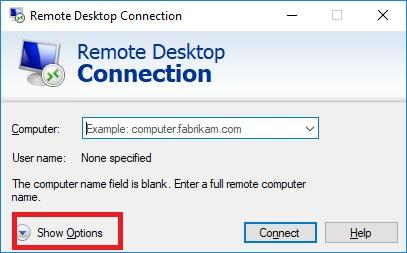
- From your desktop's search box, type-in Remote Desktop, and click on the Remote Desktop Connection app.

- Click on Show options.
- On the Computer: section, type-in, 199.185.120.58:8033
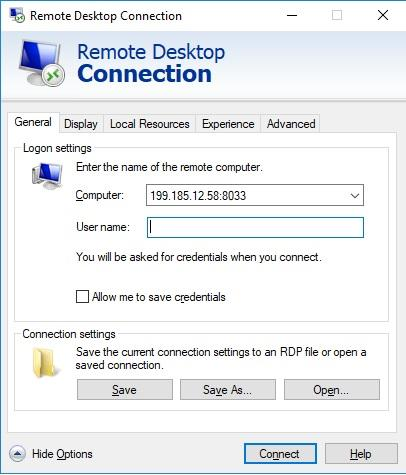
- Type-in your normal Concordia username, and click on Connect.
- You will be asked for your log-in credentials when you connect.
- On successful log-in, you will be presented with the remote desktop window. Do not close this, as all the things you need to do/access will be through this remote desktop window.
- At the end of your access, always choose the log-out (Sign out) option.